Incidents Overview
In the OH&S node, navigate to Incidents sub-node and then to the required location (as described in Navigation). This will display a pane on the right with all the information associated with the selected location. Note that the structure here is the same as the OH&S Locations structure, and this can be expanded in the same way as OH&S | Locations.
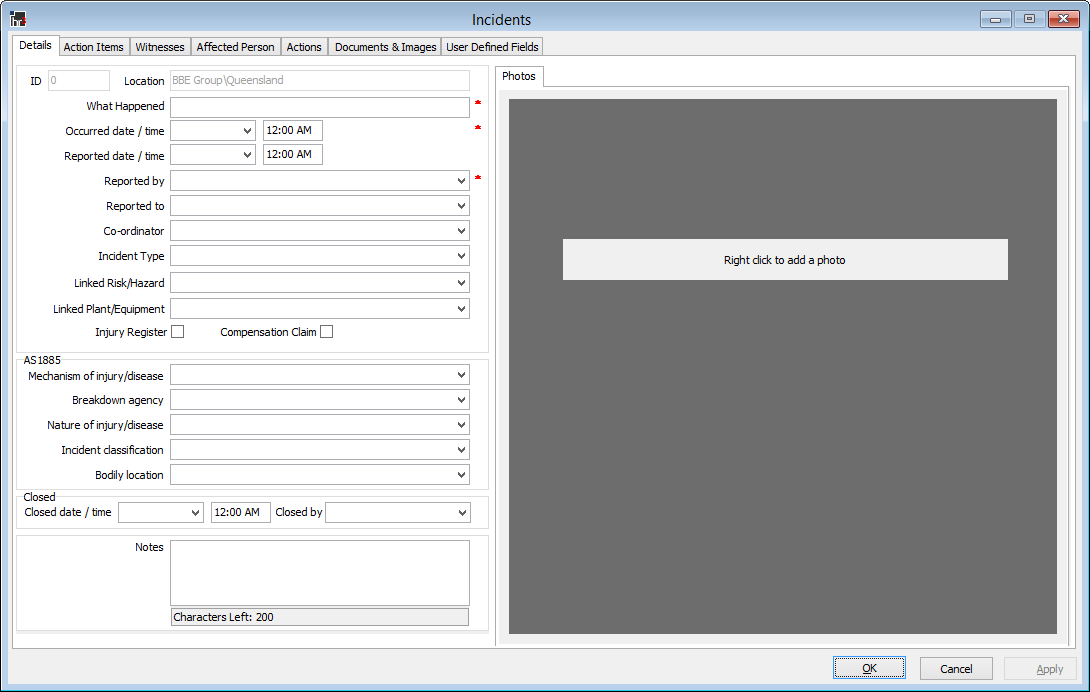
The Incidents window allows you to view incident history, or add an OHS incident to the location where it has occurred.
It is very important to create the entry in the correct location as it cannot be moved to another location. If it is created in the wrong location, you would need to delete the entry and then recreate it in the correct location.
In the incident details you have the option of linking the Incident to a known Hazard.
For example, a hazard may have been identified as “the reception tiled floor is very slippery when wet” and recorded in Hazards. An action from that hazard may have been to place an absorbent mat in the entry and to place a warning sign at the reception entrance. Then, if a visitor or employee slips on the tiles, the recorded incident can be linked to the specified hazard. This shows the employer had made a conscious effort to warn people of the hazard and took actions to prevent injury.
Incidents Window
You may navigate to an existing Incident using the methods described in Navigation.
Alternatively, if a new OHS incident has occurred at a location, you will add the details of the incident to the relevant location.
- Highlight the location in the tree structure
- Click Add New to open the Incidents window:

See Incidents Window - Tabs for a description of the fields on this screen.
